adsense analytic

Showing posts with label Revit architecture. Show all posts

Friday, July 12, 2019

Microcenter Group and Autodesk to make Partnership to offer training on BIM and CAD

MicroCenter Group ties a knot with Autodesk to provide advance education on Autodesk design application, BIM and CAD.

Renowned information technology solutions company MicroCenter Group has officially declared its academic joint venture with Autodesk.

The program will facilitate the formation of an Autodesk authorised learning centre, Design BIM Studio, and Certiport authorised test centre.

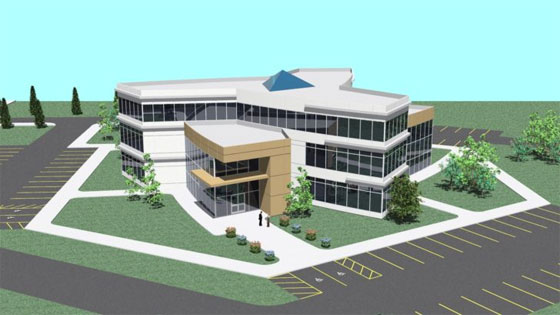
The purpose of this alliance is to reanalyze advanced education and work skills in Autodesk design applications, 2D and 3D CAD designs, infrastructure designs, building information model (BIM) and BIM co-ordination, 3D model and real-world visualization.

The collaboration provides more value to industry professionals who will opt for advanced education on Autodesk software applications through the Micro Training Center (MTC), a subsidiary of MicroCenter Group.

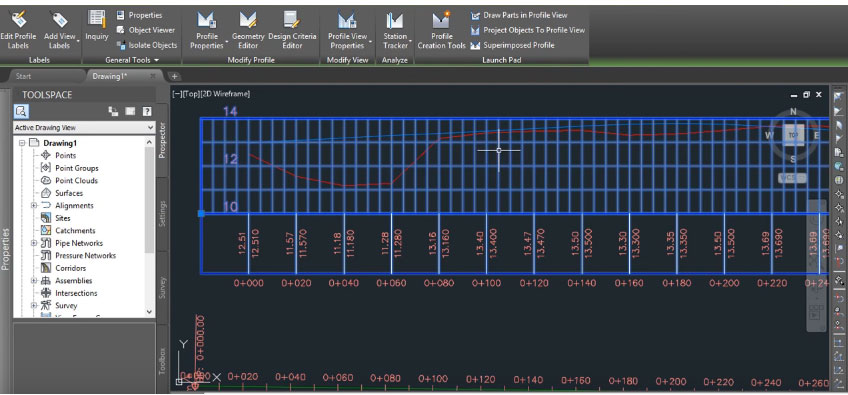
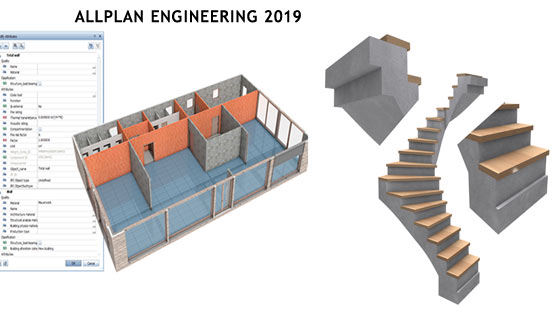
Courses will be conducted on AutoCAD, AutoCAD-Civil 3D and Map 3D, AutoCAD–Plant 3D, Revit Architecture, Revit MEP and Structural, Navisworks, Inventor, 3DS Max, Fusion 360 and Maya and Autodesk professional certification.

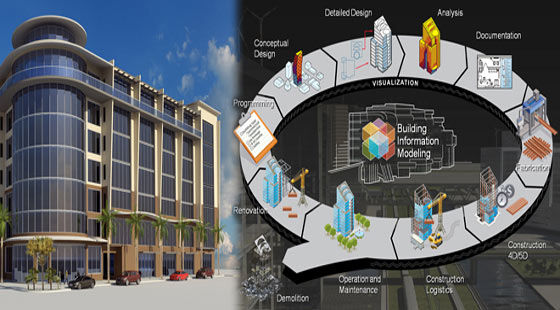
MicroCenter Special Projects Business and MTC will set up BIM design and BIM Education centre this year, to provide complete building information modelling and implementation services through the 3D laser scanning technology, for building, infrastructure and metro-rail projects.

BIM studio will arrange advanced and professional skills training to engineers, architects, industry professionals, educators, and students.

Esri and Autodesk work in tandem to mutually provide GIS and BIM across multi-disciplinary teams and project life cycles.

The objective is to maintain an integrated and collaborative workflow that progresses understanding of projects within the framework, and minimizes inefficiencies, data loss, and cycle times.

Designers and engineers will be able to get GIS content from ArcGIS Online into Infraworks via the Autodesk Connector for ArcGIS.

Content such as roads, pipelines, and electrical transformers will be directly imported depending on an authoritative, subsisting geographic system of record.

Read more

Microcenter Group and Autodesk to make Partnership to offer training on BIM and CAD

~~~~~~~~~~~~~~~~~~~~~~~~
Published By
Rajib Dey
www.bimoutsourcing.com
~~~~~~~~~~~~~~~~~~~~~~~~

Tuesday, March 12, 2019

Vacancy for Commercial Architects w/Revit

Peloros.io is a well-known staffing firm which is mainly located in San Francisco, CA, US. It is established in 1993 and since then they have been partnering with Architecture and Interior Design firms.

They have many clients throughout California who are currently seeking for talented individuals for contract, temp-to-permanent and direct-hire opportunities.

Job profile: They have been working as an agent who are helping to get some full-time direct –hired Architects w/3-15 years of experience for their mid to large-size Architecture clients in San Francisco. So it is a wonderful opportunity to work in dynamic and collaborative studios on various project types. The candidates should have well-known knowledge and experience in architecture with a preferred focus on large scale commercial shell and core work. Besides that, the candidates must have a good experience as well as be self-starters with excellent organization, communication and interpersonal skills.

Specific qualifications: The candidates must have authorized Professional Degree in Architecture with at least 3 years of professional experience. They should be skilled at multitasking and working toward deadlines that mean there will be pressure to complete their tasks on time so candidates must be prepared enough to handle pressure.

Candidates must be able to work in a fast-paced design environment and must be able in and professional office experience with Revit.

• Local candidates need to apply only
• No sponsorship will be provided to the candidates.


Contact information: Willing applicants can contact on the following address to submit their resume and samples, samples should not be longer than 10mb: nick@peloros.io/

For any other information please contact to their website: www.peloros.io Jobs Source archinect.com

Vacancy for Commercial Architects w/Revit

~~~~~~~~~~~~~~~~~~~~~~~~
Published By
Rajib Dey
www.bimoutsourcing.com
~~~~~~~~~~~~~~~~~~~~~~~~

Monday, January 21, 2019

How to import AutoCAD files into Revit

In this exclusive Revit tutorial, you will get some useful tips to import DWG or AutoCAD files into Revit. You will be able to convert any AutoCAD project, 2d plans into a 3D model into Revit.

Initially, you will learn how to set up the file in CAD prior to put it on Revit to get rid of any trouble with the file for working with it. Then you will learn the proper procedure to import as well as how to perform all the setups, place it and lock in exact location.

Then, you will be guided to setting all visibility graphic and how to set up entire view to view your floor plan in AutoCAD properly as well as how to apply this plan efficiently to model your revit file.

To download the project file, click on the following link. www.patreon.com

How to prepare your DWG file :

1. Open the file in AutoCAD.
2. Verify xrefs (externally referenced DWG files). If some exist, connect them to the drawing, with the Insert option to get rid of excess layers.
3. Run SETBYLAYER to eliminate any color, linetype, or lineweight overrides from objects.

4. Run PURGE to eliminate any leftover layers, linetypes, blocks, and styles.
5. Freeze any unnecessary layers.
6. Apply SAVEAS to save a copy of the file in your “CAD Links” folder (or wherever your standard linked file location is).


To learn the complete method for importing CAD files to Revit, go through the following tutorial.

Video Source: Balkan Architect

~~~~~~~~~~~~~~~~~~~~~~~~
Published By
Rajib Dey
www.bimoutsourcing.com
~~~~~~~~~~~~~~~~~~~~~~~~

Thursday, December 27, 2018

Learn to generate surface profile from file in AutoCAD Civil 3D

In this exclusive autocad tutorial, you will learn how to generate surface profile of existing road from file in AutoCAD Civil 3D. The surface will be created directly based on the labels and profiles. You don’t to draw surface separately. Initially, it is required to generate profile from file.

It is possible to generate a surface profile either from a horizontal alignment on a surface or from a surface profile file.

While generating a centerline profile, just produce one or more offset profiles simultaneously. Employ the Draw in Profile View option to illustrate the profile in the drawing.

Click Home tab > Create Design panel > Profile drop-down > Create Surface Profile Find.

In the Create Profile from Surface dialog box, in the Alignment list, choose the horizontal alignment to be utilized for the profile.

Make sure, that the surface to be utilized should be listed in the select surfaces list. If several surfaces are listed, apply Ctrl + click to choose one or more of them from which the profiles will be formed.

Optionally, in the Station Range area, indicate start and end stations if it is necessary for the profile to cover a distance under the entire length of the horizontal alignment.

Click Add to add the centerline profile to the Profile List.

Optionally, choose the Sample Offsets check box. Put the offset distances in the field if it is required for the profile to comprise one or more offsets from the centerline of the horizontal alignment. Apply positive numbers to indicate exact offsets, and negative numbers for left offsets. It is recommended to utilize commas to detach the values. As for instance : 20,-20,30,40.

Optionally, click Add to add the offset profiles to the Profile List.

In the table, to make analysis of the data for each profile line and make modifications when necessary.

Optionally, add or delete profiles in the Profile list.

Optionally, choose the Sample Offsets check box. Put the offset distances in the field if it is required for the profile to comprise one or more offsets from the centerline of the horizontal alignment. Apply positive numbers to indicate exact offsets, and negative numbers for left offsets. It is recommended to utilize commas to detach the values. As for instance : 20,-20,30,40.

In the table, to make analysis of the data for each profile line and make modifications when necessary. Optionally, add or delete profiles in the Profile list.

Perform one of the following:

If it is required to draw the profile in a profile view, click Draw In Profile View, and then opt for the create profile view method.

Click OK. The generated profiles are saved. If the alignment contains one or more profile views connected with it, the generated profiles are attached to the views.

Learn to generate surface profile from file in AutoCAD Civil 3D

Read more


~~~~~~~~~~~~~~~~~~~~~~~~
Published By
Rajib Dey
www.bimoutsourcing.com
~~~~~~~~~~~~~~~~~~~~~~~~

Saturday, November 24, 2018

A position is vacant for Revit Designer in US locations

Alex Pettas Architecture is a three-year old architecture firm based at Los Angeles just east side of Culver City in CA and currently they are working on residential projects in Bentwood, the Hollywood Hills, San Francisco and Sonoma County as well as retail projects. Their aesthetic is rooted in California modernism.

Currently they have urgent need for a highly stimulated Designer for playing an essential role in the design and production of projects from concept through Construction using Revit.

They are looking for a candidate who is immensely passionate and dedicated about architecture, has a strong work experience and also enthusiastic to play a vital role to their projects while handling them carefully. They belong to an office culture which is creative, communicative and collaborative.

Qualification, Skills and Requirements:

• Applicants must have an experience of 1-4 years in an architecture firm.
• A degree from an authorized architecture program is a must have thing.
• Revit experience with proficiency in Adobe CC is needed.
• A candidate should be self-starter who will able to manage multiple assignments.
• He or she should be strong enough in communication like gin graphic, written and verbal.
• Candidate should be attentive to little details and go for thorough process.


Technology Experience and Expertize:

• Candidate must examine agency needs, ensure code compliance and control permitting process.
• Research finish materials and products.
• Have to flexible enough to handle clients and attend project site meetings.
• Candidates who live around Log Angeles have to be the legal work ability in the U.S.


Benefits: They are offering a competitive salary, paid time off, health insurance benefits, bonuses and ARE exam subsidies; there will be also bonus day off during the year-end holidays. But they don’t sponsor H1b applicants.

Contact info: Interested person can email their resume and portfolio to info@pettas.com. Attachments should be no longer than 15 MB.

Apply now: archinect.com

A position is vacant for Revit Designer in US locations

~~~~~~~~~~~~~~~~~~~~~~~~
Published By
Rajib Dey
www.bimoutsourcing.com
~~~~~~~~~~~~~~~~~~~~~~~~

Thursday, October 11, 2018

Allplan 2019 is just launched with some new and advanced features

Allplan 2019 is launched to provide huge benefits for architects and engineers to implement BIM efficiently in building and infrastructure.

The latest version comprises of several functions to simplify the formation of buildings and structures with high geometric complexity. It also makes the co-operation smooth among planning partners in BIM projects.

Moreover, many detail improvements also ensure greater convenience and flexibility in work processes. The newly developed stair module facilitates the architects to model complex stairs in a time-saving and accurate manner.

Allplan 2019 offers the architects and engineers to employ a BIM tool to work in concert successfully at any phase of the BIM process.

Allplan 2019 includes new views and sections for reinforcement detailing. With this feature, write-access to the building model is not necessary while detailing reinforcement.

By applying the new property palette, settings like format, visualization and attributes for different components for instance walls, ceilings, foundations, roofs and rooms can be controlled effectively. With the Object palette, it is possible to categorize objects with their properties.

IFC is the standard interface for openBIM projects. The newest version IFC4 offers a further enhancement that allows exporting elementary geometry information (“BaseQuantities”) in BIM projects.

With the new stair modeler in Allplan Architecture 2019, stairs are generated instantly and easily. Staircase components like steps, substructure or stringers as well as properties are specified with the aid of a separate pallete. Axis, sections, steps or distances are easily rectified with handles.

A 30-days free trial version is available for Allplan Architecture 2019 and Allplan Engineering 2019 from www.allplan.com or www.allplan.com/engineering.

Allplan 2019 is just launched with some new and advanced features
~~~~~~~~~~~~~~~~~~~~~~~~
Published By
Rajib Dey
www.bimoutsourcing.com
~~~~~~~~~~~~~~~~~~~~~~~~

Saturday, October 6, 2018

How to use group tool in Revit for multi-storied buildings

This is a very useful tutorial for Revit users. The tutorial presents brief guidelines on how to apply group tool in Revit with repeating levels when working with multi-storied buildings.
If any buildings contain various floors and the floors are equivalent, then group’s tool can be used to simplify and speed up the process as well as create any modifications rapidly to all the floors.

Given below, some handy tips to create a group in Revit :-
Create a group by selecting the components or existing groups, and utilizing the Create Group tool.
In a project view, choose the required components or existing groups to be needed in the group.
Click Modify | Multi-Select tab  Create panel  (Create Group).

Note: If one element type is only chosen, the respective Modify | tab shows rather than the Multi-Select tab.
In the Create Group dialog, provide a name for the group.
Note: The name of this dialog will differ on the basis of the types of components which are already been selected.
In order to open the group in the group editor, choose Open in Group Editor.
The group editor facilitates you to include or exclude components from a group, attach detail groups (for model groups), and view group properties.

Click OK.
To download the project and Revit files, click on the following link. www.patreon.com

How to use group tool in Revit for multi-storied buildings

~~~~~~~~~~~~~~~~~~~~~~~~
Published By
Rajib Dey
www.bimoutsourcing.com
~~~~~~~~~~~~~~~~~~~~~~~~

Thursday, September 27, 2018

Customized Revit Courses Offered to Design Firms

Dankor architectural conducts customized Revit classes for the design firms. Dankor Architecture conducts instructional Revit courses in Sydney, Melbourne, and Brisbane. Now, the architectural firm from Melbourne has extended its Revit courses to involve classes which are specially customized to individual design firms.

The Australian government makes an appeal to utilize the Revit platform for all the government building projects so anyone associated with building projects and design becomes expert in applying Revit.

To facilitate the other design firms to execute it, RevitCourse now organizes personalized Autodesk Revit instructional classes which are arranged with the firms’ time schedules, provided in specified locations, and taught in formats varying from one-on-one to group settings.

Revit courses cover virtually all phases of the platform’s use, and curricula can be custom-made to deal with the particular requirements and priorities of various firms. Various design groups employ the program for slightly dissimilar tasks, so classes that focuses interrelated actions as well as teach the users how to apply Revit effectively to attain their companies’ goals are one of the most useful and competent ways to learn the program.

To get more details, go through the following link www.revitcourse.com.au

Customized Revit Courses Offered to Design Firms

~~~~~~~~~~~~~~~~~~~~~~~~
Published By
Rajib Dey
www.bimoutsourcing.com
~~~~~~~~~~~~~~~~~~~~~~~~

Saturday, September 1, 2018

How to use Revit to design facade elements

In this revit video tutorial, you will learn how to generate the façade elements as wall sweeps as well as modeling a custom wall sweep for that.

The Sweep tool in Revit can be used to add a baseboard, crown molding, or other type of decorative horizontal or vertical projection to a wall. You can add a wall sweep to a wall from a 3D or elevation view.

To add a sweep for all walls of a type, you modify the wall structure in the wall’s type properties.

It is possible to schedule wall sweeps. Integral wall sweeps, which belong to the wall type definition, cannot be scheduled separately.

If wall sweeps are formed at several heights and then later on set to the similar height, the sweeps miter at the joins.

While editing vertically compound walls, the sweeps tool can be used to manage placement and display of sweeps or reveals on all walls of that type.

To learn the complete process, watch the following video tutorial.

Video Source: Balkan Architect

~~~~~~~~~~~~~~~~~~~~~~~~
Published By
Rajib Dey
www.bimoutsourcing.com
~~~~~~~~~~~~~~~~~~~~~~~~

Friday, August 10, 2018

Some exclusive online Revit courses for beginners and advanced Revit users

Given below, the detail lists of some exclusive online free and paid courses for the beginners and advanced users of Revit.

Mass Building using Autodesk Revit: In this preparatory course, one will be familiar with the revit interface by creating the design of a basic building. The course is specifically designed for beginner and professionals architects who want to commence with Revit in their projects. This course is absolutely free.

For registration, click on the following link www.udemy.com

Full Project Using Revit Structure - Basic Modeling: This course train you how to create the design of a structure with columns, beams, foundations, floors, and slabs. This course is intended for beginner and intermediate users, who prefer to start with Revit and gather deep knowledge in using different Revit tools. The course is totally free.

For registration, click on the following link www.udemy.com

Learning Autodesk Revit Architecture 2016: This course is completely designed for the beginners. No prior experience is needed for this course. The course explores with the software interface and then explains how to model, set and modify some elementary architectural components. It is a paid course.

For registration, click on the following link www.udemy.com

Learning Autodesk Revit MEP 2016: In this course, the beginners Revit users will gather knowledge on the fundamental design of mechanical, electrical, and plumbing systems. No prior knowledge is necessary for this course. It is a paid course.

For registration, click on the following link. www.udemy.com/

Revit 2018 Architectural Course For Beginner With Project: This course is very useful for the students and the beginners. The course focuses on the fundamentals of how to apply the software then proceeds on to modeling a 2-story house model. It is a paid Course.

For registration, click on the following link www.udemy.com

Revit Structure 2018 from Zero to Hero: By undertaking this course, you will be able to build up complete structural projects, with foundations, columns, beams, floors, and defining loads and their combinations, as well as gather knowledge on how to export them and demonstrate them as plans. It is a paid course.

For registration, click on the following link www.udemy.com

Revit 2019: Essential Training for Architecture (Imperial) - Without requiring previous experience, In this course, you will be familiar with various tools in Revit 2019 and how to use Revit 2019, from the interface to the modeling, as well as provides the information and integrate it with others software like PDF and AutoCAD. It is a paid Course.

To get more details on these types of other online courses, go through the following link archdaily.com

Some exclusive online Revit courses for beginners and advanced Revit users

~~~~~~~~~~~~~~~~~~~~~~~~
Published By
Rajib Dey
www.bimoutsourcing.com
~~~~~~~~~~~~~~~~~~~~~~~~

Wednesday, November 22, 2017

How to perform MEP modeling in a jobsite with Revit

In this Revit video tutorial, you will learn how to use Revit for creating MEP modeling of a site office, canteen, outdoor switch room with distribution boards, transformers, diesel generator and fuel tank.

Given below, some useful features of Revit for MEP modeling :-


• Mechanical Systems: Create the design of various types of mechanical systems like duct system to fulfill the heating and cooling requirements of the building. With the use of various tools, form duct systems to arrange air terminals and mechanical equipment in a project. By applying automatic system creation tools, generate duct routing layouts to unite the supply and return system components.
• Electrical Systems: Develop electrical systems (circuits) to arrange devices, lighting fixtures, and electrical equipment in a project.
• Piping Systems: Develop piping systems with the arrangement of mechanical components in a model and attribute them to a supply or return system. Then, with the use of various layout tools, define the most recommended routing for the piping that relates the system components.
• MEP Fabrication Detailing: Arrange LOD 400 content from the Autodesk Fabrication products (CADmep, ESTmep, and CAMduct) inside Revit MEP to generate a more coordinated model. Produce a perfect model for detailers within construction firms that reflects the intended installation.
• Spaces: Arrange spaces in all the sections of the building model to preserve values applied for accomplishing heating and cooling load analysis on the building model.
• Zones: With the use of the zone tool, it is possible to identify spaces to be managed with environmental control systems like heating, cooling, and humidity control systems. It facilitates you to execute load balancing and analysis procedures on a building model.
• Use the System Inspector: System Inspector is applied to observe the properties for a selected duct or pipe system.
To learn the process for MEP modeling, watch the following video tutorial.


~~~~~~~~~~~~~~~~~~~~~~~~
Published By
Rajib Dey
www.bimoutsourcing.com
~~~~~~~~~~~~~~~~~~~~~~~~

Friday, September 22, 2017

Formit 360 Autodesk

Autodesk® Formit® 360 is used to capture building design concepts for the appeared ideas. Those ideas are created in a compact digital format which will be used in the real-world site information like satellite images, for orienting the designs. Real building and environmental data is used for supporting design brainstorming. Preliminary designs are changed to centralized data storage for accessing and refinement in Autodesk® Revit® software or other applications.

This Formit360 released a lot of new goodies and also released an updated version for Ipad Pro, a Windows version and integration with Dynamo. The released notes followed:

• Internet connection is not needful for working in Formit360 when Formit360 Pro or trial is validated
• Online works is need when it is connected to the Formit 360 services like A360 Drive, Insight 360, Real-time Collaboration, Google Maps etc. and many more
• It can be modeled and navigated easily with the touch-enabled Windows devices with the use of the finger, stylus, mouse and keyboard
• Scripts can be placed and flexed from Autodesk Dynamo Studio
• The modeling tools are Shell, Filet, Mirror and many more
• The export options are Export Visible and Export Selected
• Exported file types are FBX, SAT, DAE, DXF
• The files such as SKP and SAT could be opened and imported directly to Formit
• The Visual Styles are like Monotone surface for an exquisite rendering effect
• For removing the material easily paint is done with the use of default material
• The area per level are viewed
• The user need to view the nested groups to select the groups from a tree view
• Then Ungroup All and the Model
• High DPI screens will be seen in high resolution icons with full clarity
• Keyboard shortcuts are Customized, Imported, Exported
• Next add, remove and relocate the toolbars, then set the UI theme in blue or white

Release Notes for Formit 360 for iPad and iPad Pro:

• It has the full support for iPad Pro resolution
• Formit 360 now supports the Apple Pencil. So the user can sketch more flawlessly and can use pressure for locking into a selected axis
• There will be some sound when anyone snapped to a point and moving along in an axis. It also disable the Settings menu
• There are new actions for undo and redo. For undo double flick to the left is needed and for redo to the right
• There is a new monotone surfaces for a subtle visual style
• It has improved performance, reliability and accuracy in Insight 360 Energy Analysis
• It has improved its performance for fixing the bugs

Release Notes for Formit 360 for Web:

• File operations are organized for allowing local and A360 Drive access
• There are monotone surfaces for a subtle rendering effect
• Export options are Export Visible and Export Selected
• Modeling Tools like Mirror, Offset Edges, Extrude Edges and many more are accessible here through keyboard shortcuts
• It has improved performance, reliability and accuracy in Insight 360 Energy Analysis
• It has improved its performance for fixing the bugs
Release Notes for Formit 360 for Android has improved their performance and fixed the bugs.

For more detail follow autodesk-revit.blogspot.in


~~~~~~~~~~~~~~~~~~~~~~~~
Published By
Rajib Dey
www.bimoutsourcing.com
~~~~~~~~~~~~~~~~~~~~~~~~

Wednesday, June 7, 2017

Spring 2017 Updates For IdeateApps For Revit Users

Ideate Software just declared its spring 2017 updates for IdeateApps. This new update comprises of the new 2018 version of four new tools and the four current tools. Besides, there will be improved features of the 2017 and 2016 versions. These solutions are compatible with Autodesk Revit 2016, 2017, and 2018.

IdeateApps belongs to a series of tools which streamline the day-to-day activities of Revit users.
Given below, some exclusive features of the new tools. You can get an online demonstration of these tools by clicking on this link. (ideatesoftware.com).

• Ideate SpellCheck enhances the quality control processes by examining the spelling of Text and Schedule elements inside a Revit project file. (2017 and 2018 only)
• Three new sheet management tools simplify workflows to save time and enhance the perfectness of the model.
• Ideate SheetManager is a robust new Revit project browser that has the ability to manage various challenges. It contains a robust search engine for filtering the Sheet and View lists and supports arranging or repositioning Views onto Sheets.

• Ideate Align makes sure that a View on one Sheet is organized with a View on another or several other Sheets.
• Ideate Clone facilitates the users to copy a Sheet along with its properties and arrange unplaced Views onto new Sheets that adjust with the previous Views.
Given below, some substantial improvements to Ideate Software’s currents tools:
• Ideate ReNumber, which streamlines the method of renumbering elements, now comprises of exceptional support for Grids and Viewports.
• Ideate XRay, that detects the reasons an element isn’t shown in a specific view, now comprises Advanced Selection Help to simplify the process to choose a hidden view.

The collection of IdeateApps tools can be accessed with a non-commercial free trial. Click to download the trial today. For more information on IdeateApps for Revit 2018, call 888.662.7238 or contact sales@ideatesoftware.com. For support, contact support@ideatesoftware.com.

Spring 2017 updates for IdeateApps for Revit users


~~~~~~~~~~~~~~~~~~~~~~~~
Published By
Rajib Dey
www.bimoutsourcing.com
~~~~~~~~~~~~~~~~~~~~~~~~

Tuesday, May 2, 2017

How To Generate 3D Interior Views In Revit Architecture

In this Revit video tutorial, Pierre Derenoncourt, a renowned AEC design technology specialist and environmental designer, briefly explains how to apply a 3D camera inside Revit to generate an interior view within a model.
In Revit Architecture, a camera can be placed once it is activated from your ribbon, View tab, Create panel. Click the small arrow adjacent to the 3D view, and click camera button on the drop down menu. Now the camera can be set with two simple clicks with camera position and target position.
As soon as the camera is set, Revit will open a new view automatically. This view will be appeared as what your camera see. Generally, we should have modified the view. Ensure modify is active and select the view boundary. Some blue grips on the rectangle sides will be visible. By dragging the grip, the boundary can be resized.
You can modify the movement of your camera around by holding [shift] + mid button.

To get more information, go through the following Revit Tutorial.

Read more

~~~~~~~~~~~~~~~~~~~~~~~~
Published By
Rajib Dey
www.bimoutsourcing.com

~~~~~~~~~~~~~~~~~~~~~~~~

Thursday, April 27, 2017

New Railing Feature And Other Crucial Features In Revit 2018

This revit video is created on the new improved railing feature in Revit 2018. The revit users can now include railings to a whole multistory stair tower and topography with a simple mouse click. Besides, railings can be grouped with their host stairs as per their level heights. The users can flip the run line by component in stair.
Some other crucial features are :-
3D Hook for Rebar , this tool can flip your hook around the axis of Rebar and is very useful for create Reinforcement Detailing.
Tag with Thumbnail View originates from the perspective view in the family. By applying crop thumbnail, the users can produce only one region for every tag.
With the addition of magic tools in Revit 2018, it becomes easier for generating the wall layer in edit assembly dialogue. Now, it is possible to generate group out of your preferred layer for each wall and then edit and control this groups and attach them to another walls.

To be familiar with more new features, click on the following link. auto-beta-desk.blogspot.in

Read more

~~~~~~~~~~~~~~~~~~~~~~~~
Published By
Rajib Dey
www.bimoutsourcing.com

~~~~~~~~~~~~~~~~~~~~~~~~

Thursday, January 12, 2017

How To Generate Subregion Of A Toposurface In Revit Architecture

A subregion describes an area of the toposurface where a various set of properties can be used. As for instance, material.

Toposurface subregions belong to areas which should be drawn within current toposurfaces.

One can apply subregions to sketch parking lots on a graded surface, roads, or islands. To make the process easy apply a detailed component as a template and apply Pick Lines tool available in subregion editor. It is also possible to lock the boundaries of the subregion to the picked lines of the detail component. The subregion is modified automatically while shifting the detail component.

While generating subregions, no individual surfaces are produced. In order to make individual surfaces to be edited seperately, use the Split Surface tool.


~~~~~~~~~~~~~~~~~~~~~
Published By
Rajib Dey
~~~~~~~~~~~~~~~~~~~~~