adsense analytic

Showing posts with label revit tutorial. Show all posts

Monday, July 15, 2019

How to create perfectly designed stairs in Revit

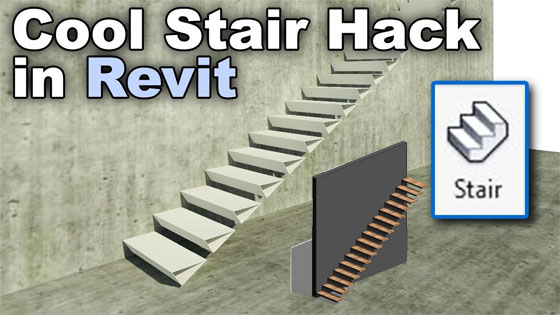
In this Revit tutorial, you will get some useful tricks which can be applied in the stair family within Revit to generate perfectly designed stairs.

You will learn in detail how to create a stair profile; how to edit and modify it to make stunning stairs.

Methods of creating stairs:

There exist two elementary methods for making stairs inside Revit Architecture. One can apply the “Run” tool or manually specify the stair boundaries and the location of the risers.

To apply both methods, one should remain in a plan view at the time of generating the stairs. For sketching out the stair boundaries and the riser lines, the following points should be kept in mind.

1) At what (vertical) level do the stairs start and end. It can be easily performed by choosing relevant levels. In most of the cases, these levels will relate two adjoining finished floor levels- one above the other.

2) The boundaries of the stairs- ie the sides of the stair should be on your left and right as you walk up and down them.

3) The position of the risers. In most cases, one will prefer the first riser to start at the base of the stair, the last riser should be at the top and all other risers should be placed uniformly in between. It is also possible to place each riser differently according to your choice.

To get more details, watch the following video tutorial.

Read more

How to create perfectly designed stairs in Revit

~~~~~~~~~~~~~~~~~~~~~~~~
Published By
Rajib Dey
www.bimoutsourcing.com
~~~~~~~~~~~~~~~~~~~~~~~~

Monday, July 8, 2019

How to use full navigation wheels in Revit

In this Revit tutorial, you will get details on Full Navigation Wheels inside Revit.

The Full Navigation Wheels (big and mini) comprise of common 3D navigation tools which are useful for both visualizing an object and walking through a building.

The big and Mini Tour Building wheels give access to the tools given below:

• Zoom. Zooms in and out of the existing view.
• Rewind. Retrieves the most current view. It is possible to move backward or forward by clicking and dragging left or right.
• Pan. Shits the model up, down, to the left, and to the right.
• Orbit. Modify the orientation of the model by rotating the model around a pivot point when the view gets fixed.
• Walk. Simulates walking through a model.
• Up/Down. Slides the existing view of a model across the Z axis of the model.
• Look. Revolves the current view.
• Center. Specifies the center of the existing model view.


Note: While one of the Full Navigation Wheels is demonstrated, just press and hold the middle mouse button to pan, scroll the wheel button to zoom in and out, and press the SHIFT key at the time of pressing and holding the middle mouse button to orbit the model.

To change to the Mini Full Navigation Wheel

• Right-click on the wheel and click Mini Full Navigation Wheel..
To change to the big Full Navigation Wheel
• Right-click on the wheel and click Full Navigation Wheel.

Go through the following video tutorial to learn the applications of full navigation wheel.


How to use full navigation wheels in Revit

~~~~~~~~~~~~~~~~~~~~~~~~
Published By
Rajib Dey
www.bimoutsourcing.com
~~~~~~~~~~~~~~~~~~~~~~~~

Thursday, November 15, 2018

Some handy tricks for curtain walls in Revit

In this revit tutorial, one can learn some useful tips to generate curtain walls in Revit.

The curtain wall tool in Revit is mainly applied for walls having complicated patterns, special railings and even casework.

The curtain walls comprise of similar features of a basic wall. They include bottom and top constraints and their profile is rectified.

There are some major additional features in the curtain walls :-

Curtain Grids
These belong to division formed on the walls. These divisions can be horizontal or vertical.


Mullions
Mullions are components which can be produced on each curtain grid section and on each curtain wall extremities.


Curtain Panels
Curtain panels belong to rectangular components which are situated among each curtain grids.


Curtain Walls are generated in the same manner similar to regular walls. Choose the wall tool in the architecture tab.

While selecting a type, it is necessary to scroll down to opt for a wall in the curtain wall category. These walls contain a glass icon next to them.

Go through the following video tutorial to get familiar with the tips for curtain walls.

Some handy tricks for curtain walls in Revit

Read more
~~~~~~~~~~~~~~~~~~~~~~~~
Published By
Rajib Dey
www.bimoutsourcing.com
~~~~~~~~~~~~~~~~~~~~~~~~

Wednesday, July 25, 2018

How to create parametric walkway in Revit

In this revit video tutorial, you will be familiar with the necessary steps to model a parametric walkway (twisted looking structure with triangular grid) in Revit.

It begins like a conceptual mass family. You will learn the methods essential for creating model of a spline with triangular profiles at various angles as well as transform it into a form.

Then you will gather knowledge on how to create the model of a curtain panel based family and load it into the mass. Finally, you will learn how the mass is loaded into the project with the addition of a concrete strip at the floor level.

While generating a mass family in the Family Editor, it is possible to load the family into a project, and set instances of the mass family in the project.

Click NewConceptual Mass. In the New Conceptual Mass dialog, opt ofr Mass.rft, and click Open.

The file is available in the following folder:
%ALLUSERSPROFILE%\Autodesk\\Family Templates\\Conceptual Mass


The conceptual design environment opens. The Forms tool and other tools are applied to generate the mass.

In the tutorial, the following shortcuts are used to accelerate the speed of the work.


UN - Project Units
CS - Create Similar
RP - Reference Plane
Al - Align LL – Level

To view the complete processes, go through the following revit tutorial.

Video Source: Balkan Architect

How to create parametric walkway in Revit

~~~~~~~~~~~~~~~~~~~~~~~~
Published By
Rajib Dey
www.bimoutsourcing.com
~~~~~~~~~~~~~~~~~~~~~~~~

Monday, January 1, 2018

Revit Rendering Techniques

This Revit tutorial provides some useful tricks on how to save huge time in your rendering process (for both interior and exterior rendering) with Autodesk Revit Architecture and make superior 3D graphics. The tutorial also focuses on how to accomplish an Autodesk 360 rendering.


This rendering method can be utilized for all your draft rendering views and a few final renderings can be selected for in-product Revit rendering.
Rendering in Autodesk A360 is specifically designed for the students and educators. This software can be used to generate powerful, near-photorealistic visualizations in the cloud through virtually infinite computing power.
Some exciting features:-
Photorealistic rendering: Create spectacular, superior-quality renderings from designs and models with cloud rendering in A360 (US site).
Batch rendering management: Cloud rendering in A360 deals with big batches of rendering jobs in quickest possible time needed on your desktop.
Panoramas, solar studies and illuminance: Accomplish solar study renderings and steer through interactive panoramas. Produce illuminance simulations. Relate environments to rendered scenes.
Interactive Rendering Beta: A real-time photorealistic-rendering surrounding that produces making stunning images and phonograph animations easily.


Read Continue

~~~~~~~~~~~~~~~~~~~~~~~~
Published By
Rajib Dey
www.bimoutsourcing.com
~~~~~~~~~~~~~~~~~~~~~~~~

Saturday, April 1, 2017

How To Produce Solar/Shadow Studies With Revit

Prior to start a solar study, organize a view to show light and shadows. Apply the following useful tips :-
• Generate a 3D view.
To show light and shadows efficiently on a project, apply 3D views of the building model. Show standard plan views like floor plans and ceiling plans, abstain from demonstrating various elements in 3D, therefore, there will be no shadows to be casted from these elements.
The sun path and shadows can be accessed in all 3D views devoid of those applying the Wireframe or Consistent Colors visual style. In 2D views, the sun path can be accessed in floor plans, reflected ceiling plans, elevations, and sections.

Note: The sun path’s on-screen controls can’t be edited in perspective, walkthrough, or rendered 3D views.
• Rotate a view to True North to perfectly demonstrate the position of the sun concerning the project through solar study.
• While creating a lighting solar study, state the location of the sun corresponding to the view.
Source: knowledge.autodesk.com


How to produce solar/shadow studies with Revit

~~~~~~~~~~~~~~~~~~~~~~~~
Published By
Rajib Dey
www.bimoutsourcing.com
~~~~~~~~~~~~~~~~~~~~~~~~


Wednesday, January 4, 2017

Learn The Basics Of Dynamo & Installation Process For Revit

The Revit tutorial is specifically designed to teach you the fundamentals of Dynamo as well as how to download and set up the software to produce your initial graph.

Dynamo stands for an open-source visual programming tool that can simplify the process for developing your own tools in Revit. Dynamo can be used to generate complicated geometry, automate monotonous tasks, and visualize any Revit model all from a user-friendly interface.

Dynamo now fully compatible with Revit 2017 and does not need an extra download.


How to set up Dynamo for Revit 2017: Once Revit 2017 is installed, the users can’t find Dynamo in manage tab instantly. Initially, the users have to run the Dynamo installer again and ensure to verify Revit 2017 to include Dynamo to this new install. Choose the components for installation; remove the components which should not be installed. Click next when everything is ready to process further.

The following video tutorial will help you to install Dynamo for Revit 2017.


~~~~~~~~~~~~~~~~~~~~~
Published By
Rajib Dey
~~~~~~~~~~~~~~~~~~~~~

Saturday, September 3, 2016

Revit Rendering Techniques

This Revit tutorial provides some useful tricks on how to save huge time in your rendering process (for both interior and exterior rendering) with Autodesk Revit Architecture and make superior 3D graphics. The tutorial also focuses on how to accomplish an Autodesk 360 rendering.

This rendering method can be utilized for all your draft rendering views and a few final renderings can be selected for in-product Revit rendering.

Rendering in Autodesk A360 is specifically designed for the students and educators. This software can be used to generate powerful, near-photorealistic visualizations in the cloud through virtually infinite computing power.

Some exciting features:-

Photorealistic rendering: Create spectacular, superior-quality renderings from designs and models with cloud rendering in A360 (US site).

Batch rendering management: Cloud rendering in A360 deals with big batches of rendering jobs in quickest possible time needed on your desktop.

Panoramas, solar studies and illuminance: Accomplish solar study renderings and steer through interactive panoramas. Produce illuminance simulations. Relate environments to rendered scenes.

Interactive Rendering Beta: A real-time photorealistic-rendering surrounding that produces making stunning images and phonograph animations easily.


~~~~~~~~~~~~~~~~~~~~~~
Published By
Rajib Dey
~~~~~~~~~~~~~~~~~~~~~~

Thursday, September 1, 2016

How To Add Sanitary Sloped Piping In Revit 2017

This is a very useful video tutorial for Revit users. By watching the tutorial, one can learn how to use Revit 2017 for adding sanitary sloped piping.

There are different methods to use a slope to piping:

The slope commands on the ribbon can be applied at the time of drawing piping.
The slope controls related to an obtainable pipe can be used to produce small slope values or modify the slope for definite pipe segments.

The slope editor is used to produce slope to a complete system or parts of a system.
Draw piping at the preferred angle in a section view or an elevation view to assign large slope values.

The slope options on the ribbon can be applied to identify the slope while drawing horizontal pipe in a view. This process is usually applied to identify small slopes.


~~~~~~~~~~~~~~~~~~~~~
Published By
Rajib Dey
~~~~~~~~~~~~~~~~~~~~~

Tuesday, August 16, 2016

How Dynamo is used to generate Topography from Excel Data Point in Revit 2017

This Revit video tutorial concisely analyzes how to develop Topography out of excel data point in Revit 2017 with Dynamo. Dynamo is an addin for Revit. Dynamo can establish a bidirectional link amid Revit and Excel.

The users can apply the Dynamo graphical programming platform in a useful way to round trip targeted information amid Revit and Excel. Besides, Dynamo can extract Revit Topography Surface Data Point into Excel.

After installing Revit 2017, one can’t see Dynamo in the Manage tab. Initially, one has to rerun the Dynamo installer and ensure to verify Revit 2017 to include Dynamo to this new install.

Once the set up is finished, launch Revit 2017 and Dynamo will be accessible to you in the Manage tab, Visual Programming panel.


~~~~~~~~~~~~~~~~~~~~~
Published By
Rajib Dey
~~~~~~~~~~~~~~~~~~~~~

Wednesday, August 10, 2016

How to create lattice wall blocks with Revit 2017

This Revit tutorial is presented by Victor Cessa, who studied at Faculty of Architecture , Universidad Veracruzana Xalapa.

In this Revit video he briefly shows how to use Revit 2017 for developing lattice wall blocks with various symbol block lattices.

Download Revit 2017 Free Trial


~~~~~~~~~~~~~~~~~~~~~~
Published By
Rajib Dey
~~~~~~~~~~~~~~~~~~~~~~

Thursday, August 4, 2016

Some useful Revit tips for creating the design of a swimming pool or any water material in Revit

This exclusive Revit Tutorial is brought to you by Smarter Architect. One will be familiar with step-by-step processes for making the design of a swimming pool or a body water in Revit.

The tutorial starts with modeling an easy Revit Toposurface. One can also learn how to produce a water material with Revit. It is vital for allotting the perfect rendering material to the Revit pool massing that will be developed out of a building pad element.

The similar method for allotting materials from the Autodesk asset browser to the project is followed for rendering materials in Revit. This Revit tutorial will guide you to simplify the processes for modeling any custom shaped Revit pool or developing a water material in Revit.


~~~~~~~~~~~~~~~~~~~~~~
Published By
Rajib Dey
~~~~~~~~~~~~~~~~~~~~~~

Wednesday, July 27, 2016

How to render with Revit Architecture from initial to final stage

This is a timelapse video on modeling and final rendering with Revit Architecture. Here the detailed process is shown to transfer model from initial stage to final render.

Autodesk 360 Rendering software is applied to produce renders. By watching this Revit Tutorial one can learn to produce photorealistic renders of your Revit projects.

Tips: While Renderng in Revit the Revit.exe process does not support the majority of the memory and performance usage.

There exist a second process alias fbxooprender.exe that commences at the time of rendering and manages the rendering.


~~~~~~~~~~~~~~~~~~~~~~
Published By
Rajib Dey
~~~~~~~~~~~~~~~~~~~~~~

Tuesday, July 26, 2016

How to import CAD drawing of Jhali Wall into Revit & generate Adaptive Component/Family (Jhali Wall)

Learn the role footings play in keeping foundations from settling and how to size them properly for soil conditions.

This Revit tutorial is based on how to generate adaptive component for Jhali Wall in Revit. Adaptive component is ideal to produce Jhali wall as the size of component can be easily modified according to your choice. There exist 3 templates for developing adaptive components but in this Revit tutorial, specific curtain panel pattern is utilized to produce Jhali wall.

Open the curtain panel pattern based template to view grid system that is truly tile pattern, reference lines (in green color) and points which refer to adaptive points. Adaptive points contain numbers on them. These adaptive points, grid system and reference lines are modifiable.

Jhali Wall is created with AutoCAD and the CAD drawing for Jhali Wall is imported to Revit.


~~~~~~~~~~~~~~~~~~~~~~
Published By
Rajib Dey
~~~~~~~~~~~~~~~~~~~~~~

Friday, July 22, 2016

How to use split element tool in Revit 2017 to divide vertical columns

This Revit video tutorial sheds light on some useful revit tips to segregate columns in Revit 2017.

In Revit 2017, there is a Split Element tool that can now split vertical columns at the preferred points by levels devoid of any addins in Revit to perfectly identify the objective of the design.


This feature will enhance the workflow and expand the ease of use for fabrication models.


Download Revit 2017


~~~~~~~~~~~~~~~~~~~~~~
Published By
Rajib Dey
~~~~~~~~~~~~~~~~~~~~~~

Friday, July 8, 2016

How construction professionals can build pile wall systems by integrating Revit 2017 and Dynamo extension for Revit

This Revit tutorial briefly explains how to apply Revit 2017 together with Dynamo for building a piled wall system. This method will be useful for contig or secant piled wall systems.

Dynamo refers to a visual programming language extension within Revit softwar. Dynamo extension can automate tedious manual Revit tasks. With Dynamo, the users can efficiently manoeuvre data, sculpt geometry, delve into design options, automate processes, and generate links amid numerous applications. Dynamo is free and supports Revit 2015, 2016, and 2017.
While developing Piled wall systems inside Revit, it requires to generate a structural wall and next 2D detail in plan to represent a piled wall system or usually set each male and female pile as well as apply the array or copy commands.

But the process becomes tedious when curves and turns are conflicted inside the path. Dynamo can easily resolve this issue and be applied for sheet piling along with secant and contiguous systems.

Go through the following link to get the complete tutorial revitstructureblog.wordpress.com


~~~~~~~~~~~~~~~~~~~~~~
Published By
Rajib Dey
~~~~~~~~~~~~~~~~~~~~~~

Wednesday, May 25, 2016

How construction professionals can build pile wall systems by integrating Revit 2017 and Dynamo extension for Revit

This Revit tutorial briefly explains how to apply Revit 2017 together with Dynamo for building a piled wall system. This method will be useful for contig or secant piled wall systems.

Dynamo refers to a visual programming language extension within Revit softwar. Dynamo extension can automate tedious manual Revit tasks. With Dynamo, the users can efficiently manoeuvre data, sculpt geometry, delve into design options, automate processes, and generate links amid numerous applications. Dynamo is free and supports Revit 2015, 2016, and 2017.

While developing Piled wall systems inside Revit, it requires to generate a structural wall and next 2D detail in plan to represent a piled wall system or usually set each male and female pile as well as apply the array or copy commands.

But the process becomes tedious when curves and turns are conflicted inside the path. Dynamo can easily resolve this issue and be applied for sheet piling along with secant and contiguous systems.

Go through the following link to get the complete tutorial revitstructureblog.wordpress.com


~~~~~~~~~~~~~~~~~~~~~~
Published By
Rajib Dey
~~~~~~~~~~~~~~~~~~~~~~

Monday, May 9, 2016

Revit 2017 features Daylight Rendering to render a view with Sunlight

Autodesk Building Solutions presents this exclusive Revit video tutorial that offers brief instructions for showing the rendering dialog, identifying simple settings, as well as rendering a daytime view.

Revit 2017 facilitates the users to render rapidly and perfectly through Autodesk Raytracer rendering engine. It is the default visualization engine in Revit 2017.

With well-organized settings, video card agnostic CPU operation, and exceptional utilization of image-based lighting, Raytracer offers instant, more photorealistic results for architectural rendering.


~~~~~~~~~~~~~~~~~~~~~
Published By
Rajib Dey
~~~~~~~~~~~~~~~~~~~~~

Wednesday, May 4, 2016

Some useful Revit Tips for importing Revit to AutoCAD

This exclusive Revit Architecture tutorial will teach you the detailed process for importing Revit into AutoCAD to optimize the architecture design. In Revit Architecture, there is a “import CAD” button.


One can also view the types of CAD files which are already imported into Revit. Just open the insert tab and select Import CAD to open a dialog box. The files of Type Pull-Down menu includes all the file types (.dwg, .dfx, .dgn, .sat and .skp) already been imported into Revit.
The Revit video will cover the following :-

1. Basic Concepts
2. Familiar with the Revit Environment
3. Initiate a Project
4. Fundamentals of Modeling
5. Links, Imports, and Groups
6. Sketch-Based Modeling Components
7. Complex Walls
8. Visibility and Graphic Controls
9. Rooms
10. Schedules and Tags
11. Annotation and Details
12. Key features of Families
13. Sheets, Plotting, and Publishing


~~~~~~~~~~~~~~~~~~~~~~
Published By
Rajib Dey
~~~~~~~~~~~~~~~~~~~~~~

Tuesday, April 12, 2016

Create an accurate architectural planning with Revit enscape real time render plugin

Enscape 3D presents an exclusive Revit video tutorial that speaks on the Enscape real time render plugin in Revit to develop perfect architecture planning.
With this Revit Plugin, the Revit users can get real-time assessment in 3D for DESIGN REVIEW, QUALITY CONTROL AND CLIENT PRESENTATIONS.

This Revit plugin offers some useful features like Depth of Field, Volumetric Fog, Colour Temperature, Cloud density, Bloom intensity, Exposure, PaperMode, PaperMode Line Thickness.
Enscape is compatible with Enscape™ exlusively supports Autodesk Revit 2014, 2015 and 2016 as well as Windows 7 SP1 or higher version.
Download a 14-days free trial version from www.enscape3d.com

With this trial version the Revit users can upload their project and produce a walkthrough quickly, export superior screenshots instantly, analyze your lighting, materials and acoustics.


~~~~~~~~~~~~~~~~~~~~~
Published By
Rajib Dey
~~~~~~~~~~~~~~~~~~~~~