adsense analytic

Showing posts with label Autodesk Revit. Show all posts

Tuesday, June 18, 2019

New features and installation process of ProtaStructure 2019

ProtaStructure provides as an inventive structural BIM solution for structural engineers to model, analyze and design buildings perfectly and rapidly.
The software allows you to simply compare various schemes and automate your steel and concrete design from one central model, decreasing design time and raising the profitability of the project.
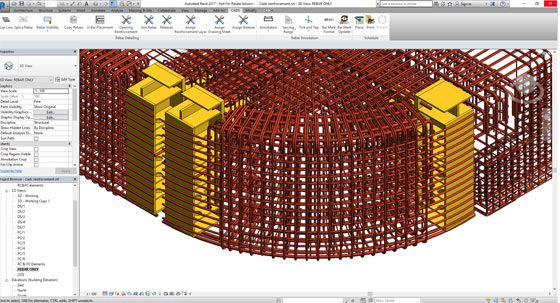
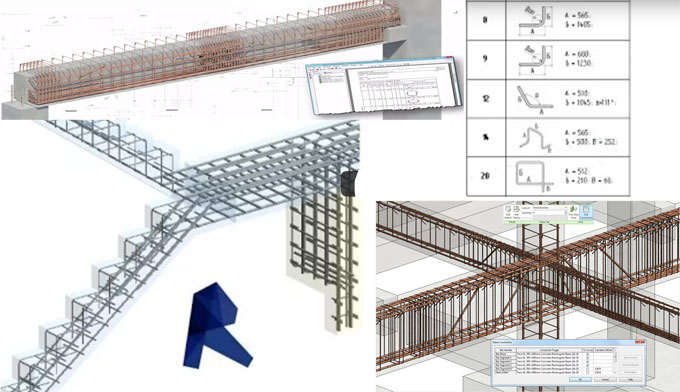
The software provides some advanced integrated features like grouped member design, 3D FE Analysis, staged construction and seismic design, foundations and punching shear checks to instantly create results.
The software manages the changes easily and continuously coordinates the projects with architects, owners and other stakeholders with intelligent BIM integration.
The software offers the following exclusive features :-
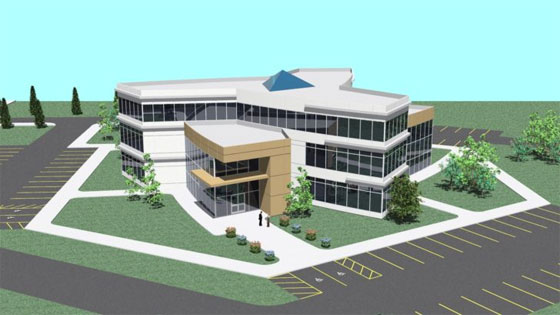
ProtaStructure is based on one model. It allows you to model simple or complex concrete and steel buildings with greater speed and simplicity.
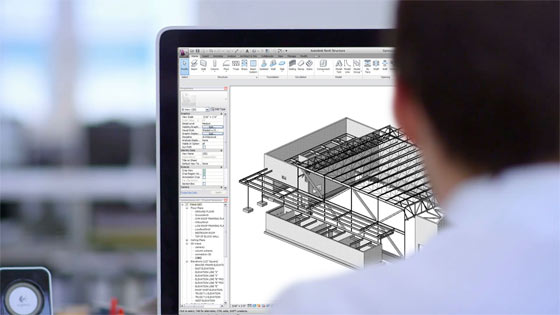
The software continuously communicate and modify models with other recognized BIM systems like Autodesk Revit, Tekla Structures, ArchiCAD and latest data formats along with IFC’s.
Save significant time by coordinating projects beforehand with other project stakeholders together with architects and owners. Synchronize models with other important BIM platforms like Revit and ArchiCAD.
Employ various interactive features like auto grouping, iterative transformed section design, and merged core walls to make the best use of building design. Swiftly evaluates a wide array of design alternatives to set up the most cost-effective solution for your clients.
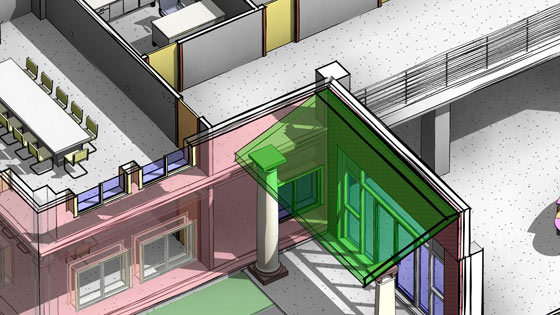
Apply physical objects together with trusses, beams and slabs to produce and visualize models rapidly and effectively.
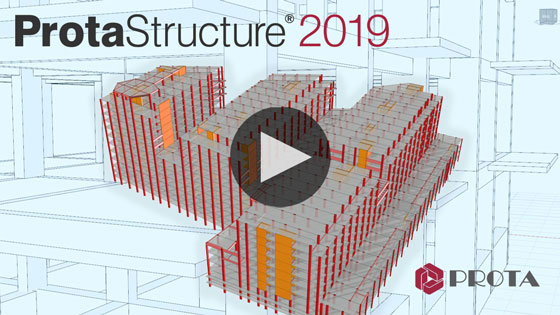
Go through the following video tutorial to learn how to set up PROTA STRUCTURE 2019 easily.

New features and installation process of ProtaStructure 2019
~~~~~~~~~~~~~~~~~~~~~~~~
Published By
Rajib Dey
www.bimoutsourcing.com
~~~~~~~~~~~~~~~~~~~~~~~~

Friday, February 8, 2019

How to create façade lighting design with LIGHTS add-in for Revit

LIGHTS stands for a lighting design application that covers more than 70 families of lighting fixtures along with photometric web files, precise technical data, and real-life functionalities.

The LIGHTS plugin for Revit comprises of different types of lighting fixtures for various applications like industrial lights to bollard lighting fixtures for both interior and exterior. It allows its users to produce lighting design efficiently, quick and hassle-free whereas working inside the Autodesk Revit.

This plug-in allows the users to drag and drop selected lighting fixtures directly to the model and smoothly amends specifications like color temperature, beam angle or cashing color.

Step 1: Download the LIGHTS add-in for Revit.

Step 2: Explore through for choosing the right lighting fixtures for your design. The search can be done by typing or prioritizing the categories. Select the lighting fixture and press the “Use in Revit” button.

Step 3: The color, color temperature and cashing color are selected either before or after settling the lighting fixture.

Step 4: Set the lighting fixture in the architectural model.

Step 5: If required, the angles of the lights can be modified. However, the angles are limited to equal reality.

Step 6: Once the design is finished for the rooftop lighting, go to lower levels. Select a lighting fixture and press “Use in Revit” button.

Step 7: Set the lighting fixtures in the architectural model.

Step 8: Render your design.

To get more clear ideas, go through the following video tutorial.

Click on the following link to download the lights add-in for Revit archdaily.com

~~~~~~~~~~~~~~~~~~~~~~~~
Published By
Rajib Dey
www.bimoutsourcing.com
~~~~~~~~~~~~~~~~~~~~~~~~


Wednesday, January 9, 2019

New upgradation to Revit software add-ons developed by Ideate

Ideate Software, a veteran Autodesk Developer Network member, upgrades its Revit software add-ons with new features.


Given below, the details of new features :-
Ideate BIMLink

• Capability to edit data in the program; it does not require to export it to Excel initially.
• Capability to export metric units with the predictable Excel formatting for German customers
• Capability to edit the revision sequence of a revision cloud
Ideate Explorer
• Option to pre-define the significance of all 915 Revit warning types
• Capability to look for particular warnings and edit several warnings at same time
• Option to get warnings data only when the Warnings tab remains active
• Capability to view when a project has surpassed a certain number of warnings
IdeateApps
• Ideate ReNumber is now compatible with multi-category rules
• Ideate ViewCreator deals with visibility and graphic override conditions in an efficient manner while replicating plans by level

Ideate Sticky
• Capability to shift or rename project folders in Windows Explorer and sustain Ideate Sticky pathing
• Capability to avail Excel files which are part of an Autodesk BIM360 project
• Some previously unsuitable Excel files are now consistent

New upgradation to Revit software add-ons developed by Ideate
~~~~~~~~~~~~~~~~~~~~~~~~
Published By
Rajib Dey
www.bimoutsourcing.com
~~~~~~~~~~~~~~~~~~~~~~~~

Wednesday, December 12, 2018

IMAGINiT Technologies introduced IMAGINiT Clarity for Revit 2019

IMAGINiT Technologies launched 2019 IMAGINiT Clarity Family of Products which provide a new scope for the Revit users to avail and control the model data of Revit efficiently.

There is a new dashboard and incorporation with Autodesk Dynamo facilitates the BIM professionals to obtain over 55 metrics across several projects allowing collaboration among project partners.

The followings are some new and advanced features of the product :-

MAGINiT Clarity now supports Revit 2019 and earlier versions of Autodesk Revit, as well as BIM 360 software.

A New High-Level Dashboard facilitates the BIM coordinators to observe significant data on one screen to recognize and deal with the issues instantly. On the dashboard, user-defined ranges make out issues in red and yellow facilitating BIM Coordinators to easily check trends across several models and projects and tackle any variations.

Clarity/Dynamo Integration applies bespoke Dynamo nodes to obtain model metrics that are not presently in IMAGINiT’s list of 55 metrics and pulls them into the Clarity 2019 dashboard. With bespoke Dynamo scripting, the users will be able to directly access the metrics on the opening page of the Revit model.

Integration with BIM 360 allows flexibility to project partners by providing every team a specified area to preserve their updates to the model. Teams can then take decision whether they prefer to pull in work from other project partners or distribute their work with them on the basis of important milestones.

Additional Task Management improvements like the capacity to print a hard copy and new integration with SharePoint simplify the Clarity environment and make the application simple for BIM team members.

To get more details, visit www.imaginit.com/clarity

IMAGINiT Technologies introduced IMAGINiT Clarity for Revit 2019

~~~~~~~~~~~~~~~~~~~~~~~~
Published By
Rajib Dey
www.bimoutsourcing.com
~~~~~~~~~~~~~~~~~~~~~~~~

Wednesday, December 5, 2018

How to efficiently utilize design options in Revit

In this exclusive Revit video tutorial, you will learn how to apply the stunning design options tool in Revit to explore through various design options and use them in your 3d model. Test these design options and check how they perform devoid of saving individual files.


The users can access design options in the following two ways :-
From the Manage tab > Design Options (under Design Option Panel).

At the bottom bar of the Revit window, click the icon.
When the Design Options dialog box open, it is found that the dialog box is segregated into 2 parts. The white box on the left shows all the design options available for any project. In the right side, there are the editing tools like Edit, Option Set and Option which are utilized to produce the design options.
Edit – This option allows you to edit each option. There is another option alias Switch between Options to edit option quickly.
Option Set – It is a folder that retains all the options for a specific area of interest. As for example, one Option Set for “Office Suite” and another Option Set for “Cafeteria”.
Option – These are the options produced inside the Option Set. As for instance, inside the “Office Suite” set, there is Option A, B & C furniture layout design.

Note: There are numerous Option Set in the same view, but each view can only contain one Option.
Setting up Design Option
Initially, it is required to setup all the Option Sets and Options required, then assign the components in the existing model to the exact option. An analogy is to setup folder and blank files as a place holder primarily, then include components to the blank file later.
Step 1: Under Option Set, click “New”, it will generate first set of Design Options.
Step 2: Under Option, click “New”, it will generate first design option in the set. It is possible to produce as many Option as required within the equivalent set.
Note: Revit will not permit the users to make an Option unless an Option Set is made.
Reiterate the above steps as required to generate more Option Set and Options.
The Option with the word (primary) next to it is known as Primary Option. This is the default design that shows in your model. The users can choose any option as the Primary by clicking Make Primary (under Option).
To get more clear ideas, go through the following video tutorial.
How to efficiently utilize design options in Revit
~~~~~~~~~~~~~~~~~~~~~~~~
Published By
Rajib Dey
www.bimoutsourcing.com
~~~~~~~~~~~~~~~~~~~~~~~~

Monday, November 26, 2018

SOFiSTiK Bridge Modeler – A robust software to apply BIM in bridge design & modeling

Sofistik, the leading software developer, has launched SOFiSTiK Bridge Modeler that can be used to develop parametric bridge models with alignment parameters.

It is user-friendly tool for bridge planners all through the globe. The software produces completely parametric input and semi-automated, adaptable plan creation, simplifying the process to analyse several design variants.

With SOFiSTiK, it becomes easier to obtain step-by-step complicated geometries based on the smallest detail. It can be performed by first selecting one or more axes from the road planner or by specifying the axes out of horizontal or vertical layout information. Then the required bridge cross-section is chosen from the adjustable cross-section families the software offers.

The Bridge Modeler contains advanced modeling capabilities and parameterization of the whole structure to make simple and easy analysis of numerous variants along with the computation of dimensions and costs.

The model is utilized to automatically create cross-sections with pre-dimensioned views and sections. These and other user-generated views or lists are also automatically modified with regard to modifications to the model.

The users can also produce a developed section cut of the model in Revit and add tags to it.

The software supports BIM in Bridge Design and Detailing. The users can produce parametrized 3D bridge models with alignment parameters and generic families in Autodesk® Revit® 2019.

To get more details about the software, go through the following link www.sofistik.com

SOFiSTiK Bridge Modeler – A robust software to apply BIM in bridge design & modeling
~~~~~~~~~~~~~~~~~~~~~~~~
Published By
Rajib Dey
www.bimoutsourcing.com
~~~~~~~~~~~~~~~~~~~~~~~~

Saturday, November 24, 2018

A position is vacant for Revit Designer in US locations

Alex Pettas Architecture is a three-year old architecture firm based at Los Angeles just east side of Culver City in CA and currently they are working on residential projects in Bentwood, the Hollywood Hills, San Francisco and Sonoma County as well as retail projects. Their aesthetic is rooted in California modernism.

Currently they have urgent need for a highly stimulated Designer for playing an essential role in the design and production of projects from concept through Construction using Revit.

They are looking for a candidate who is immensely passionate and dedicated about architecture, has a strong work experience and also enthusiastic to play a vital role to their projects while handling them carefully. They belong to an office culture which is creative, communicative and collaborative.

Qualification, Skills and Requirements:

• Applicants must have an experience of 1-4 years in an architecture firm.
• A degree from an authorized architecture program is a must have thing.
• Revit experience with proficiency in Adobe CC is needed.
• A candidate should be self-starter who will able to manage multiple assignments.
• He or she should be strong enough in communication like gin graphic, written and verbal.
• Candidate should be attentive to little details and go for thorough process.


Technology Experience and Expertize:

• Candidate must examine agency needs, ensure code compliance and control permitting process.
• Research finish materials and products.
• Have to flexible enough to handle clients and attend project site meetings.
• Candidates who live around Log Angeles have to be the legal work ability in the U.S.


Benefits: They are offering a competitive salary, paid time off, health insurance benefits, bonuses and ARE exam subsidies; there will be also bonus day off during the year-end holidays. But they don’t sponsor H1b applicants.

Contact info: Interested person can email their resume and portfolio to info@pettas.com. Attachments should be no longer than 15 MB.

Apply now: archinect.com

A position is vacant for Revit Designer in US locations

~~~~~~~~~~~~~~~~~~~~~~~~
Published By
Rajib Dey
www.bimoutsourcing.com
~~~~~~~~~~~~~~~~~~~~~~~~

Thursday, November 15, 2018

Some handy tricks for curtain walls in Revit

In this revit tutorial, one can learn some useful tips to generate curtain walls in Revit.

The curtain wall tool in Revit is mainly applied for walls having complicated patterns, special railings and even casework.

The curtain walls comprise of similar features of a basic wall. They include bottom and top constraints and their profile is rectified.

There are some major additional features in the curtain walls :-

Curtain Grids
These belong to division formed on the walls. These divisions can be horizontal or vertical.


Mullions
Mullions are components which can be produced on each curtain grid section and on each curtain wall extremities.


Curtain Panels
Curtain panels belong to rectangular components which are situated among each curtain grids.


Curtain Walls are generated in the same manner similar to regular walls. Choose the wall tool in the architecture tab.

While selecting a type, it is necessary to scroll down to opt for a wall in the curtain wall category. These walls contain a glass icon next to them.

Go through the following video tutorial to get familiar with the tips for curtain walls.

Some handy tricks for curtain walls in Revit

Read more
~~~~~~~~~~~~~~~~~~~~~~~~
Published By
Rajib Dey
www.bimoutsourcing.com
~~~~~~~~~~~~~~~~~~~~~~~~

Saturday, October 13, 2018

Enscape – The powerful 3D real-time rendering software

Enscape belongs to a virtual reality (VR) and real-time rendering plugin for Revit, SketchUp, Rhino and ArchiCAD. With just simple click of the mouse, Enscape starts functioning and instantly it walks through your entire rendered project.

There is no requirement for uploading to the cloud or exporting to other programs. All modifications in the project can be readily accessed to assess in Enscape.

It is possible to instantly look into various design options and demonstate projects to clients. If the client prefers to view something dissimilar in the design, Enscape will quickly illustrate the changes made to the project, even in VR. By applying the option to generate a standalone file of your architectural project, it is possible to send an Enscape file to your clients or colleagues for quick representations.

The software contains the following exclusive features :-

• Real-time walk-through
• Live link to SketchUp – Dissimilar to other renderers the alterations in SketchUp are directly reflected in Enscape
• Direct Integration - Retain your tools and employ Enscape through the SketchUp toolbar
• Standalone export - Generate an .exe file from your project that runs without SketchUp

• Effortless usage - Rendering with one click
• Virtual Reality (VR) - Oculus Rift, HTC Vive and Windows Mixed Reality support with one click
• 360° Panorama Views - Supports Google cardboard for 360° mobile view
• Video Path - Multiple options for every keyframe


Major applications :-

• Design review
• Internal presentation
• Client presentation
• Rapid render making


Free Trial Version:
The free trial expires after 14 days. After that, it's possible to buy a monthly or yearly license at the Enscape store
(http://www.enscape3d.com).

Go through the following video tutorial for live demonstration.

Enscape – The powerful 3D real-time rendering software

~~~~~~~~~~~~~~~~~~~~~~~~
Published By
Rajib Dey
www.bimoutsourcing.com
~~~~~~~~~~~~~~~~~~~~~~~~

Monday, October 8, 2018

Details of CADS RC3D for Revit

The purpose of CADS RC3D is to simplify the placement, annotation and bar marking of reinforcing steel for all types of RC structures. CADS RC expands the robust reinforcement modelling strength of Revit.

By employing the 3D modelling functionality of Revit efficiently, CADS RC3D facilitates the rebar being splitted into particle groups (bar ranges). Besides, bar marks are formed and managed, detailed reinforcement (shop) drawings are produced with the single click of mouse.

Bar bending schedules are generated automatically and material lists are exported to external production software file formats like BVBs, aSa, Soulé and Excel.

With it’s user-friendly functionality, it is possible to produce 2D detailed reinforcement (shop) drawings from Revit models.

Unique annotation functions offer ticking & tagging of bar ends in different user-defined styles.

Supplementary annotation functions are generated to detail tapered ranges and mark rebar ends.

Modelled rebar is divided into physical zones inside each element of the structure.

Reinforcing bars are allotted to exact layers and accordingly viewed more smoothly.

Advanced editing functions facilitate rebar to be duplicated from one structure to another.

Various reinforcing bars are attached together to develop new, complicated bar shapes.

Trimming reinforcement is indicated and added around openings in the structure compliant with user’s preferences.

Rebar is trimmed and expanded to openings, detail or model lines.

Superior bar placement functions facilitates arranging new bars equivalent to other reinforcement already in the structure.

Generates Bar Bending Schedules (BBS) that adheres to UK, US and other country standards.

Reinforcement is ‘called off’ in the by element ‘release’ or ‘drawing sheet’ and then managed consequently.

The BBS and ‘bar lists’ are provided onto drawing sheets or printed with industry standard reporting templates

BBS and bar list templates can be easily tailored to abide by company standards.
Go through the following video tutorial, to get more clear idea.
Details of CADS RC3D for Revit

~~~~~~~~~~~~~~~~~~~~~~~~
Published By
Rajib Dey
www.bimoutsourcing.com
~~~~~~~~~~~~~~~~~~~~~~~~

Saturday, October 6, 2018

How to use group tool in Revit for multi-storied buildings

This is a very useful tutorial for Revit users. The tutorial presents brief guidelines on how to apply group tool in Revit with repeating levels when working with multi-storied buildings.
If any buildings contain various floors and the floors are equivalent, then group’s tool can be used to simplify and speed up the process as well as create any modifications rapidly to all the floors.

Given below, some handy tips to create a group in Revit :-
Create a group by selecting the components or existing groups, and utilizing the Create Group tool.
In a project view, choose the required components or existing groups to be needed in the group.
Click Modify | Multi-Select tab  Create panel  (Create Group).

Note: If one element type is only chosen, the respective Modify | tab shows rather than the Multi-Select tab.
In the Create Group dialog, provide a name for the group.
Note: The name of this dialog will differ on the basis of the types of components which are already been selected.
In order to open the group in the group editor, choose Open in Group Editor.
The group editor facilitates you to include or exclude components from a group, attach detail groups (for model groups), and view group properties.

Click OK.
To download the project and Revit files, click on the following link. www.patreon.com

How to use group tool in Revit for multi-storied buildings

~~~~~~~~~~~~~~~~~~~~~~~~
Published By
Rajib Dey
www.bimoutsourcing.com
~~~~~~~~~~~~~~~~~~~~~~~~

Monday, September 24, 2018

ViewAQC™ for Revit® 2019 Now Available

This construction article sheds light on cement mortar composition, cement mortar ingredients, cement mortar properties and uses of mortar in building construction.

26 Degrees Software has launched ViewAQC 2019 for Revit 2019. ViewAQC now comprises of a “usage” license format, facilitating the firms to control all the projects firmwide with a single license file. With ViewAQC, the Revit team members get the ability to deal with and reference views from any Revit model into any other Revit model.

Some leading firms like Cannon Design / Chick-Fil-A / Gensler / HDR / HKS / IBI Group / KCCT NBBJ / Perkins+Will / Renzo Piano Architects / Shop Architects / SMRT Inc. are presently utilizing ViewAQC on their projects.

The incorporation of ViewAQC eliminates the possibility of error as well as time-consuming task of fake view references from linked models. With a simple click of a button, it is possible to determine which model retained the correct view reference source information, in spite of exploring through all the models to obtain it. The project team members can employ ViewAQC in the similar model devoid of any issues or overlap because of its nearly instant updating.

To get complete details, go through the following link 26degreessoftware.com

ViewAQC for Revit 2019 Now Available

~~~~~~~~~~~~~~~~~~~~~~~~
Published By
Rajib Dey
www.bimoutsourcing.com
~~~~~~~~~~~~~~~~~~~~~~~~

Thursday, September 6, 2018

Progman launched MagiCloud Connect for Revit and BIM users

Progman introduced MagiCloud Connect, an add-in application for Autodesk Revit that facilitates the users to download the BIM object from the online BIM platform alias MagiCloud directly into native Revit projects. The add-in supports Autodesk Revit versions like 2017-2019.

The users can download it free of cost from the Autodesk App Store at apps.autodesk.com.

With MagiCloud Connect, the MEP designers will be able to download BIM objects from MagiCloud and include them directly into native Revit projects as parametric Revit families.

MagiCloud is considered as the world’s biggest online respiratory of manufacturer-verified 3D BIM objects for MEP design, along with more than 1,000,000 MEP products from leading international manufacturers, as well as the only BIM platform to provide online selection and configuration tools for MEP products.

The users can easily get access to MagiCloud’s online tools for choosing and configuring manufacturer-specific MEP products and include them into Revit projects in user-defined sizes and with customizable product properties. MagiCloud presently comes with online product selection and configuration tools from the manufacturers Vallox, offering a series of air handling units, and Purus, facilitating detailed configuration of floor drains.

After setting up the MagiCloud Connect add-in on top of Autodesk Revit, the MEP designer can immediately start with selected part of MagiCloud’s BIM objects in Revit projects. Presently, MagiCloud Connect allows access to roughly 10 percent of MagiCloud’s entire selection of BIM objects at free of cost. The users of Progman’s own MEP design software MagiCAD for Revit and AutoCAD can download and apply all of MagiCloud’s over 1,000,000 BIM objects directly through the MagiCAD user interface.

The MagiCloud Connect add-in for Revit can be easily set up and utilized. The add-in is set up on top of Autodesk Revit in the similar way as any Revit add-in application. The installation inserts the MagiCloud Connect tab to the Revit ribbon, simplify the process to avail MagiCloud directly from the Autodesk Revit user interface and look for specific MEP products and product types. If a perfect product is found, the user can include the product into the Revit project by just clicking on the Install button.

To get more detail information, go through the following link www.magicloud.com

Progman launched MagiCloud Connect for Revit and BIM users

~~~~~~~~~~~~~~~~~~~~~~~~
Published By
Rajib Dey
www.bimoutsourcing.com
~~~~~~~~~~~~~~~~~~~~~~~~

Saturday, September 1, 2018

How to use Revit to design facade elements

In this revit video tutorial, you will learn how to generate the façade elements as wall sweeps as well as modeling a custom wall sweep for that.

The Sweep tool in Revit can be used to add a baseboard, crown molding, or other type of decorative horizontal or vertical projection to a wall. You can add a wall sweep to a wall from a 3D or elevation view.

To add a sweep for all walls of a type, you modify the wall structure in the wall’s type properties.

It is possible to schedule wall sweeps. Integral wall sweeps, which belong to the wall type definition, cannot be scheduled separately.

If wall sweeps are formed at several heights and then later on set to the similar height, the sweeps miter at the joins.

While editing vertically compound walls, the sweeps tool can be used to manage placement and display of sweeps or reveals on all walls of that type.

To learn the complete process, watch the following video tutorial.

Video Source: Balkan Architect

~~~~~~~~~~~~~~~~~~~~~~~~
Published By
Rajib Dey
www.bimoutsourcing.com
~~~~~~~~~~~~~~~~~~~~~~~~

Friday, August 10, 2018

Some exclusive online Revit courses for beginners and advanced Revit users

Given below, the detail lists of some exclusive online free and paid courses for the beginners and advanced users of Revit.

Mass Building using Autodesk Revit: In this preparatory course, one will be familiar with the revit interface by creating the design of a basic building. The course is specifically designed for beginner and professionals architects who want to commence with Revit in their projects. This course is absolutely free.

For registration, click on the following link www.udemy.com

Full Project Using Revit Structure - Basic Modeling: This course train you how to create the design of a structure with columns, beams, foundations, floors, and slabs. This course is intended for beginner and intermediate users, who prefer to start with Revit and gather deep knowledge in using different Revit tools. The course is totally free.

For registration, click on the following link www.udemy.com

Learning Autodesk Revit Architecture 2016: This course is completely designed for the beginners. No prior experience is needed for this course. The course explores with the software interface and then explains how to model, set and modify some elementary architectural components. It is a paid course.

For registration, click on the following link www.udemy.com

Learning Autodesk Revit MEP 2016: In this course, the beginners Revit users will gather knowledge on the fundamental design of mechanical, electrical, and plumbing systems. No prior knowledge is necessary for this course. It is a paid course.

For registration, click on the following link. www.udemy.com/

Revit 2018 Architectural Course For Beginner With Project: This course is very useful for the students and the beginners. The course focuses on the fundamentals of how to apply the software then proceeds on to modeling a 2-story house model. It is a paid Course.

For registration, click on the following link www.udemy.com

Revit Structure 2018 from Zero to Hero: By undertaking this course, you will be able to build up complete structural projects, with foundations, columns, beams, floors, and defining loads and their combinations, as well as gather knowledge on how to export them and demonstrate them as plans. It is a paid course.

For registration, click on the following link www.udemy.com

Revit 2019: Essential Training for Architecture (Imperial) - Without requiring previous experience, In this course, you will be familiar with various tools in Revit 2019 and how to use Revit 2019, from the interface to the modeling, as well as provides the information and integrate it with others software like PDF and AutoCAD. It is a paid Course.

To get more details on these types of other online courses, go through the following link archdaily.com

Some exclusive online Revit courses for beginners and advanced Revit users

~~~~~~~~~~~~~~~~~~~~~~~~
Published By
Rajib Dey
www.bimoutsourcing.com
~~~~~~~~~~~~~~~~~~~~~~~~

Friday, August 3, 2018

Brief Overview Of Reinforcement Tool In Revit

This Revit video tutorial briefly describes reinforcement tool in Revit 2017.
The video focuses on the following topics :-
Comparison ADSK templates 2017 and 2017 Weandrevit
Clamps the inclined beam
Simple task bend angle shaped reinforcement
Limb fixed length
"Enable folds in the form definition"
Error in the rod from the forward portion of the arc and
Spiral reinforcement
Reinforcement beams arc
Problem to the driven parts in Revit 2018
The reinforcement tools can be used to include reinforcement like rebar, reinforcement bars, or fabric to valid hosts ranging from concrete columns, beams, walls, foundations, and structural floors.
Brief overview of reinforcement tool in Revit

~~~~~~~~~~~~~~~~~~~~~~~~
Published By
Rajib Dey
www.bimoutsourcing.com
~~~~~~~~~~~~~~~~~~~~~~~~

Wednesday, July 25, 2018

How to create parametric walkway in Revit

In this revit video tutorial, you will be familiar with the necessary steps to model a parametric walkway (twisted looking structure with triangular grid) in Revit.

It begins like a conceptual mass family. You will learn the methods essential for creating model of a spline with triangular profiles at various angles as well as transform it into a form.

Then you will gather knowledge on how to create the model of a curtain panel based family and load it into the mass. Finally, you will learn how the mass is loaded into the project with the addition of a concrete strip at the floor level.

While generating a mass family in the Family Editor, it is possible to load the family into a project, and set instances of the mass family in the project.

Click NewConceptual Mass. In the New Conceptual Mass dialog, opt ofr Mass.rft, and click Open.

The file is available in the following folder:
%ALLUSERSPROFILE%\Autodesk\\Family Templates\\Conceptual Mass


The conceptual design environment opens. The Forms tool and other tools are applied to generate the mass.

In the tutorial, the following shortcuts are used to accelerate the speed of the work.


UN - Project Units
CS - Create Similar
RP - Reference Plane
Al - Align LL – Level

To view the complete processes, go through the following revit tutorial.

Video Source: Balkan Architect

How to create parametric walkway in Revit

~~~~~~~~~~~~~~~~~~~~~~~~
Published By
Rajib Dey
www.bimoutsourcing.com
~~~~~~~~~~~~~~~~~~~~~~~~