adsense analytic

Showing posts with label Auto CAD drawing. Show all posts

Saturday, December 29, 2018

How to design irregular shape in AutoCAD

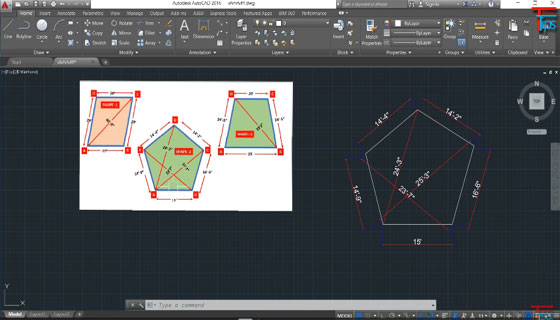
In this AutoCAD video tutorial, you will be familiar with some useful steps to create the design of any irregular shapes in AutoCAD.

By watching this tutorial, you will be able to draw any irregular shape devoid of knowing the angle of that object.

The best way is to draw the diagonal then apply intersecting circles which are drawn from the endpoints.

Area belongs to a property of AcDbPolyline. If you transform your entities to polylines, then join them with the pedit command to recover the area with the list command or via lisp.

It is not necessar to join them. Just type "area" at the command line and start selecting points, but you must close the area or it won't be perfect.

To learn the detail methods, go through the following AutoCAD video tutorial.

Video SourceTutorials Tips

How to design irregular shape in AutoCAD

~~~~~~~~~~~~~~~~~~~~~~~~
Published By
Rajib Dey
www.bimoutsourcing.com
~~~~~~~~~~~~~~~~~~~~~~~~

Wednesday, January 3, 2018

How to transform PDF underlays to AutoCAD Objects

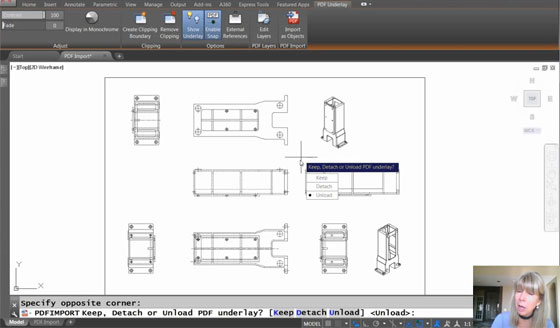
Lynn Allen, Cadalyst contributing editor and Autodesk Technical Evangelist , presents a useful video for AutoCAD professionals. In this video tutorial, Allen provides some useful cad tips to transform PDF files (underlay) to AutoCAD objects.

So, the AutoCAD users can get rid of time consuming tracing on top of PDFs to reproduce objects or draw it from the beginning.


How to import a specific area from a PDF Underlay
1. Choose the PDF underlay.
2. From the PDF Underlay contextual tab, click Import as Objects.
3. At the prompt, click two diagonal points which a rectangular crossing area, or select from one of the other options.
A crossing area is equivalent to a crossing selection. The settings option demonstrates a dialog box in which you can specify the types of objects to import, customization of layers, either the imported objects should be imported as a block, and various other options.
4. Decide whether you desire to retain, separate, or unload the attached PDF once the selected objects are imported.
The specific area of the attached PDF is imported into the drawing as AutoCAD objects.

For more details, watch the following video tutorial.

How to transform PDF underlays to AutoCAD Objects

~~~~~~~~~~~~~~~~~~~~~~~~
Published By
Rajib Dey
www.bimoutsourcing.com
~~~~~~~~~~~~~~~~~~~~~~~~

Monday, October 12, 2015

PointSense for AutoCAD can analyze 3d laser scan data in AutoCAD

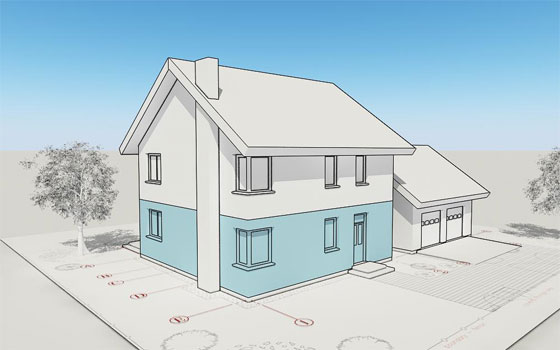
After releasing PointSense for Revit, Faro also introduced PointSense for AutoCAD. This newest CAD based application will help CAD users to control, model and scrutinize huge Autodesk point cloud data in their CAD drawings, 3D models and plans by applying a wide array of useful design toolset within PointSense that contain superior scan navigation, general shape extraction and surface analysis routines.

For more information, visit http://faro-3d-software.com/CAD


Watch the demo video


~~~~~~~~~~~~~~~~~~~~~~
Published By
Rajib Dey
~~~~~~~~~~~~~~~~~~~~~~


Thursday, December 25, 2014

How to find out the required time while completing a drawing in Autocad

Sometimes, it becomes necessary to know the time for completing a drawing in autocad (required by client for billing purpose) or evaluate your skill for completing the drawing with autocad in quickest possible time. All these are possible, if you use the ‘TIME’ command in autocad to find out the required time automatically while working on a drawing.

In order to apply the time command, provide time on the command section, the following records will be visible:-

  • Current time: It will display the present time along with the date

  • Created: The date and time for the creation of the drawing

  • Last updated: The time once the drawing was last saved

  • Total editing time: The accrued time incurred in drawing creation from session to session. AutoCAD does not take in plotting time or working time but quit devoid of saving your alterations

  • Elapsed timer: Also preserve time used in the drawing, but this can be activated or deactivated as well reorganized.

  • Next automatic save in: Notify you when your drawing will be saved automatically. You can set how frequently you save your drawing automatically. Just apply the OPTIONS command and display the Open and Save tab.

  • Next is the Enter option [Display/ON/OFF/Reset]: prompt. Following are the functionalities of these options:
    Display: Updates the listing by present times
    ON and OFF: Turns the elapsed time on and off
    Reset: Resets the elapsed time to zero

So these options are useful to help you in finding out the required time for completing a drawing.

Other option: The Express Tools EDITTIME command (type it on the command line) detects active editing time. It will function in a better way as compared to time command to represent your actual work perfectly. For start tracking, it should be activated. You can reset the time and apply the timeout option to postpone counting after a specific time of inactivity.

How to find out the required time while completing a drawing in Autocad

Image Courtesy: autocad-architecture-blog.com

Ref.: http://www.ellenfinkelstein.com

~~~~~~~~~~~~~~~~~~~
Published By
Rajib Dey
~~~~~~~~~~~~~~~~~~~